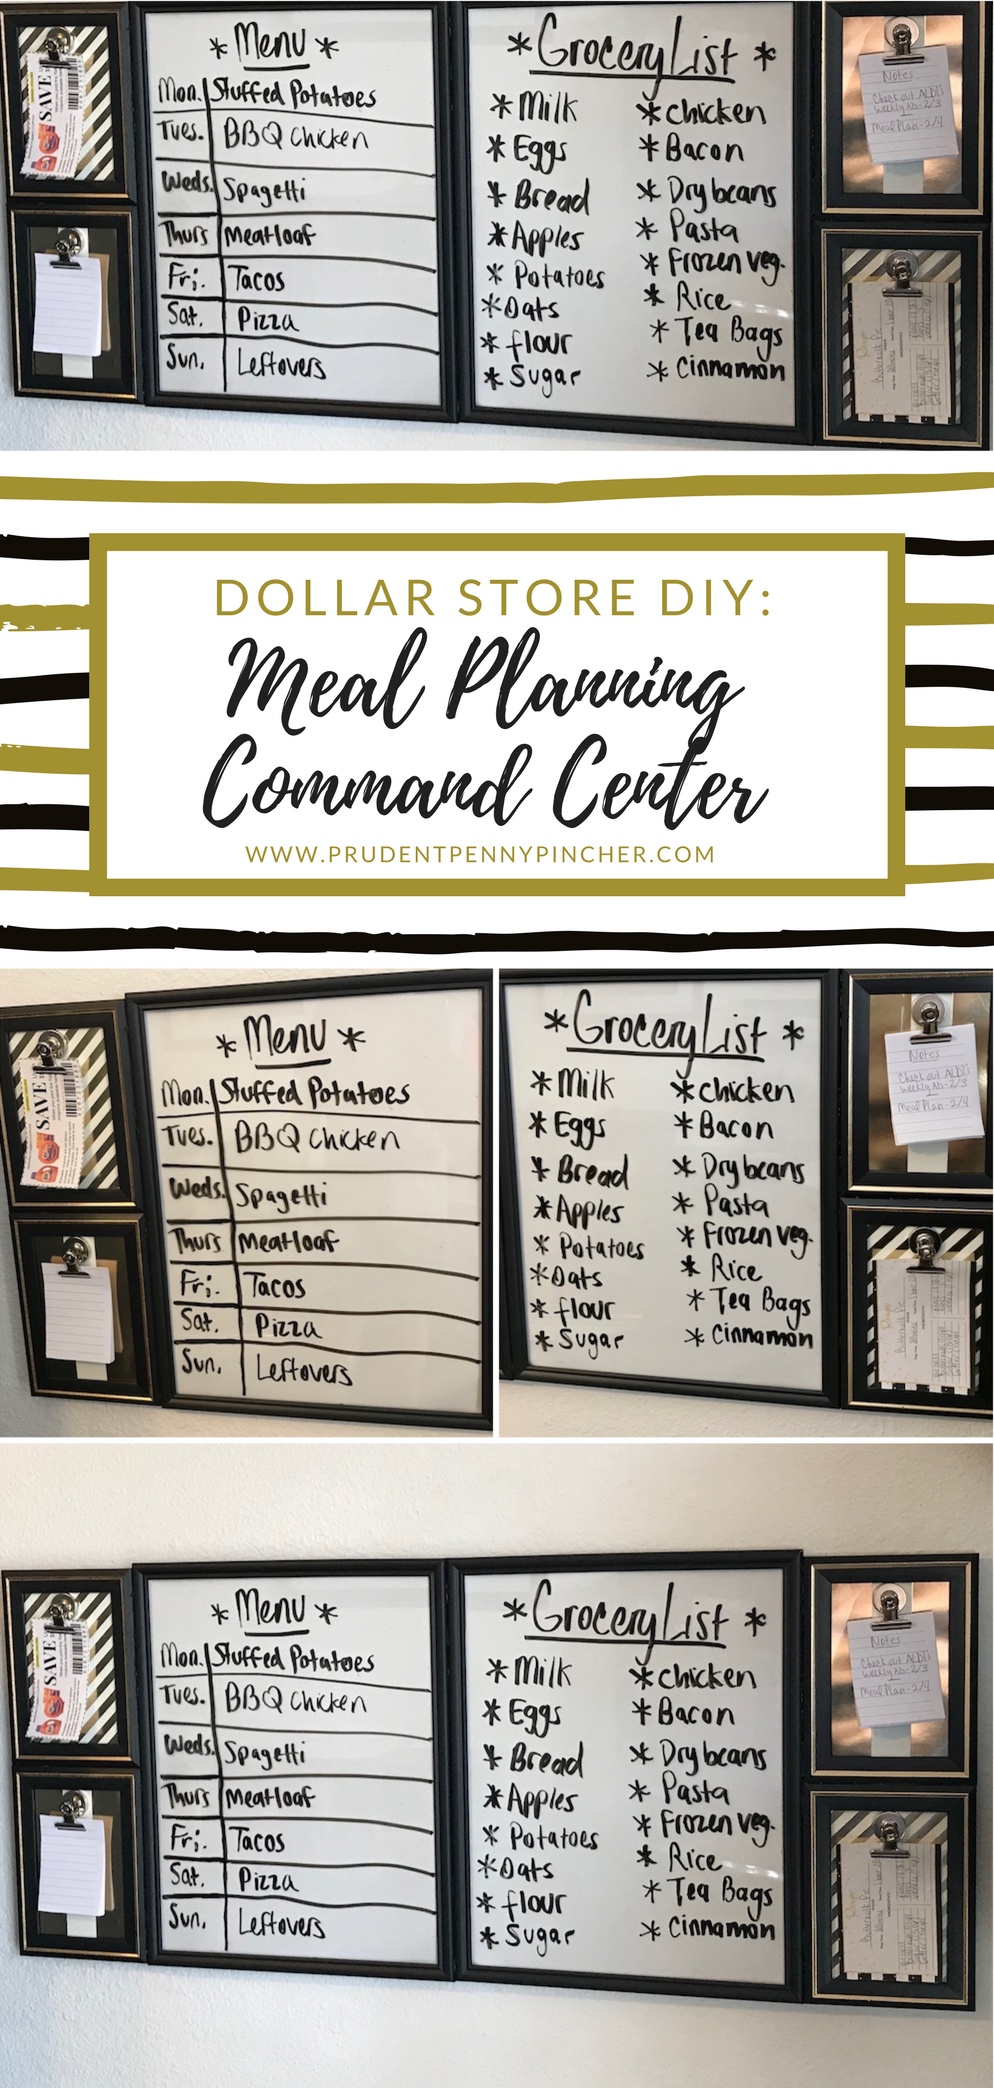
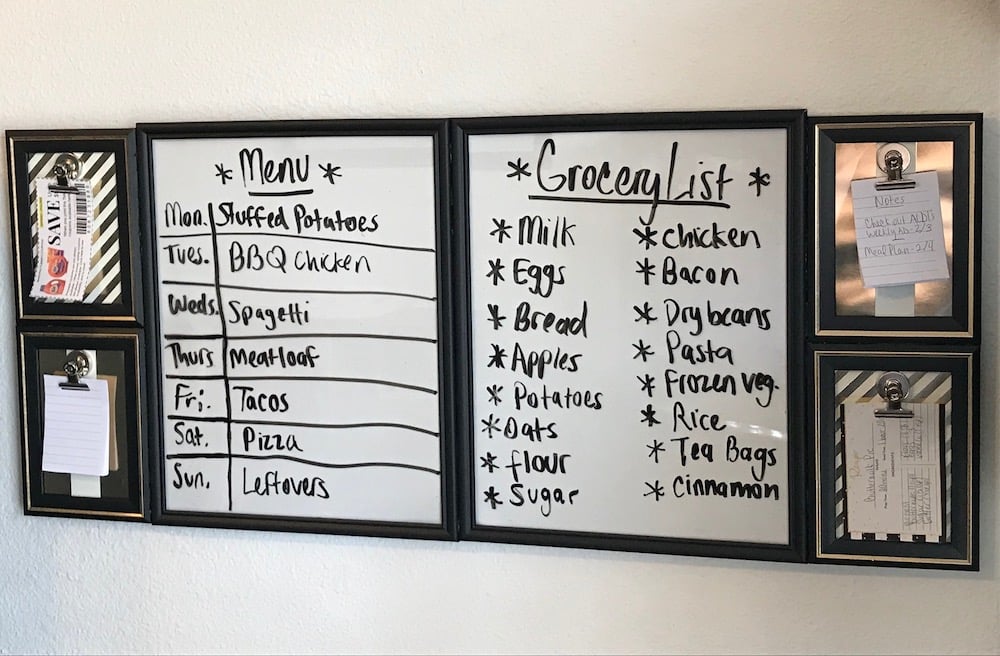
This meal planning command center features a menu, grocery list, coupons, recipe cards, and notepads all in one place to keep you organized and save you time. This project costs $10 to make and about 30 minutes to complete. Everything except the scrapbook paper can be found at Dollar Tree. You could even use decorative gift paper from Dollar Tree in place of scrapbook paper.
I got tired of being disorganized with my meal planning for the week so I created this DIY project to make sure everything was in one spot so I don’t have to wonder where I put my grocery list, coupons, and recipes. I especially like the grocery list board because you can add things to it as you go if you put the command center in the kitchen. So if you open the fridge and realize you are running low on milk, you can just add milk to the board so that its always up to date and you won’t forget to add things later. Before I got organized with this board, I would always remind myself to add things to my list and then forget what I was going to add later. To take the grocery list with you to the store, you can just take a picture of your grocery list board with your phone or you could quickly copy it down on scrap paper. Whatever works for you!
For the recipe cards, you can print out a template or make your own. I don’t bother doing it for recipes I know by heart, but I like to try at least two new recipes every week to mix things up so having those recipes in one spot ready to go makes things go quicker. I don’t have to bother printing them out at the last minute.
I included some notepads for reminders what days to check which weekly ads and when to have the meal planning done by that week. You could also add other things in that place like pocket sized calendars and circle days for reminders.
What I love about this meal planning command center is that there is a lot of room for customization based on your own needs.
Other Ideas for your Meal Planning Command Center:
- Add weekly ads to a large board. I personally just look at digital weekly ads so that’s why I didn’t do it, but whatever works for you and your family!
- Add a monthly calendar if you plan your meals for the month instead of the week.
- If you are on a strict budget, you can add a board for grocery budget worksheets.
- You can add a list of your inventory, so that you can plan your meals based off what you already have and it will be easy to update when you stock up on sale because the board will be near your kitchen!
Supplies for Meal Planning Command Center
- picture frames (two large and four small)
- scrapbook paper or other decorative paper
- glue gun (and glue sticks)
- bull dog magnet clips
- magnets
- foam board
- dry erase marker
- duct tape or similar tape
- scissors
- pencil
- push pins for hanging
Instructions for Meal Planning Command Center
- Unwrap all your picture frames. Clean the glass with a damp paper towel. Remove the picture frame stand by gently pulling it off.
- Trace the picture insert with a pencil onto your decorative paper. Cut it out so that it fits appropriately into the frame. Do this for all the small frames at once. For the large frames, I just used the blank back of Dollar Tree gift paper.
- Replace the picture inserts with decorative paper and add the backing back to the frame.
- Glue the magnets to the back of the small frames
- Glue the picture frames together. I glued two small frames together and then glued one of the large frames to those two frames and repeated for the other side and then glued the two large frames together last. Don’t use too much glue here otherwise it will show through the frames.
- Once the glue is dry carefully flip it over to the back and run through all the cracks with your glue gun to make sure its secured in place.
- Cut your foam board down to the command center’s size. Tape to the back of the command center for added support. Make sure not to put the foam board or tape over the two picture hangers on the large frames because thats how you will hang your command center.
- Add your magnetic clips to the center of the boards with your coupons, notes, recipe cards or whatever else you would like to add.
- Bonus Tip: You could glue the tip of your dry erase marker to a small string and glue the string to your board so that you won’t have to worry about finding your marker to write something down. You could also glue a Dollar Tree pencil holder to the side of the frames to put more than one color dry erase markers into for color coded organization.








Shelli Hunt says
Hello. I think your command center is amazing and I am dying to make my own. I am a little confused, however…I don’t see a dry erase board anywhere in the supplies. Are there any or are you supposed to use foam board? If that is the case, how do you get it to erase?
Please let me know. I appreciate your help.
prudentpennypincher.com says
Hi Shelli, Thank you! Glad to hear you like the project 🙂
The “dry-erase boards” are just large Dollar Tree picture frames with a white sheet of paper in the frame. The glass itself acts as a dry-erase board because you can use the dry-erase markers on it and wipe it off the glass.
Hope that helps!
Let me know if you have any more questions,
Stephy